Key Features.
How to get started.
1. When installing CDRoller, check the Include Extended Data Recovery ... box under Select Additional Tasks window. Further, this will popup User Account Control under Windows Vista/7/8/8.1/10 if you don't run CDRoller as admin by default.
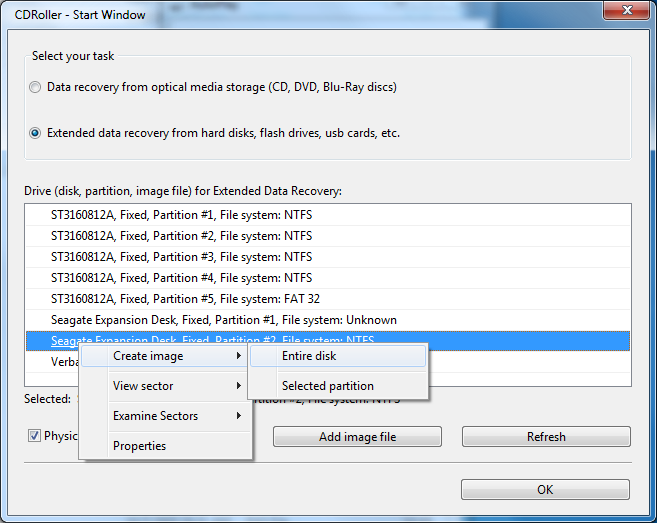
2. Simply start CDRoller and select the drive for Extended Data Recovery under CDRoller - Start Window. Click the OK button.

3. Find and recover the lost data. Simply browse the folders in the displayed partition. If you look for the deleted files, please open the $LOST FILES$ folder at first. You can use the View Image from the Tools menu in order to preview the selected pictures.

Notes.
1. Do not save the files to the same drive you're recovering from. This may overwrite the data that still need to be recovered. For instance, if you recover data from flash card, do not save the data back to the same card !
2. To change drive (disk partition), use the Select drive... option from the File menu.
Creating image file.
An image file is an exact, byte-to-byte, copy (clone) of any drive (partition) displayed under CDRoller - Start Window. CDRoller can create image files for an entire disk, selected partition or logical drive. The created images can be added into the list of drives for Extended Data Recovery and then be processed like regular disks. Also, the images can be simply imported into all major forensic tools.
To create an image, just right click on the selected object under CDRoller - Start Window and then use the Create image in the next (pop-up) menu. For physical drive, you will be prompted to select whether an entire disk or only selected partition will be processed. If unreadable sectors are detected, CDRoller replaces each byte in the bad sector by E5h pattern, in order to maintain an internal image file structure.
Recover unlimited data for only US $49! Please feel free to contact us if you have any questions regarding data recovery with CDRoller, including pre-sales support.